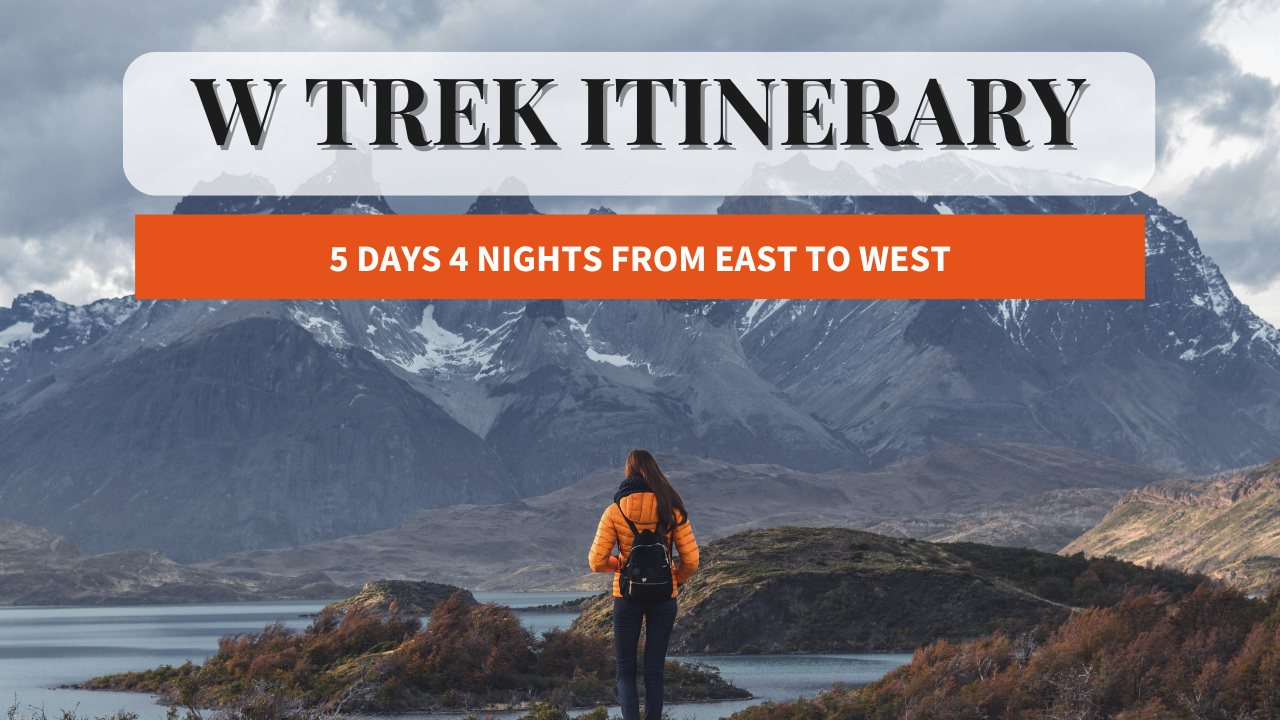
W‑Trek in Torres del Paine: A Complete East‑to‑West Guide (From My Perspective)
The W‑Trek in Torres del Paine National Park isn’t just one of the most iconic hikes in the world — for me, it’s a personal checkpoint. As I closed out 2025, this trek represents stepping into a new chapter, one where I’m choosing challenge, simplicity, and presence.
If you’re planning to hike the W‑Trek self‑guided, this post will walk you through exactly how to book it, how to plan logistics, and what to expect each day, going east to west.

Why the W‑Trek?
The W‑Trek gets its name from the route’s shape, which branches into three valleys forming a “W.” It takes you past:
The iconic Base Torres towers
The dramatic French Valley
Glaciers, lakes, hanging valleys, and endless Patagonian wind
Distance: ~80 km (50 miles)
Time: 5 days / 4 nights
Difficulty: Moderate to challenging (weather-dependent)
Step 1: Book Everything Early (3–6 Months Out)
This is the most important advice I can give.
I managed to snag the last available spots only one month out, but I do not recommend cutting it that close. Campsites sell out fast, especially December–March.
All‑in‑One Booking
I recommend starting here:
This platform allows you to book:
Campsites and refugios
Park transportation
Catamaran tickets
Lock in accommodations first — everything else revolves around those dates.
Step 2: Understand the Campsite Operators
There are two main operators on the W‑Trek:
Las Torres (East Side)
Operates campsites near Base Torres
More developed and significantly more expensive (often ~$80–90 USD/night)
Vertice Patagonia (West Side)
Operates campsites on the western half
Much more affordable (~$12–14 USD/night for camping)
You’ll likely book a mix of both.
Step 3: Transportation Logistics
Getting to the Park
Base town: Puerto Natales
Book buses via https://www.busbud.com
Bus drops you at Laguna Amarga (Las Torres entrance)
Exiting the Park
Finish at Paine Grande
Take the Lake Pehoé catamaran across the southern end of the park
Catamaran tickets can be booked via Booking Patagonia or paid on site (weather permitting)
Step 4: Gear & Food
I’m carrying all of my own gear and renting locally:
Gear Rental
Rentals Natales (Puerto Natales)
Tent
Sleeping bag
Backpack
Stove & cookware
Food
Bring all food with you or buy freeze‑dried meals in town
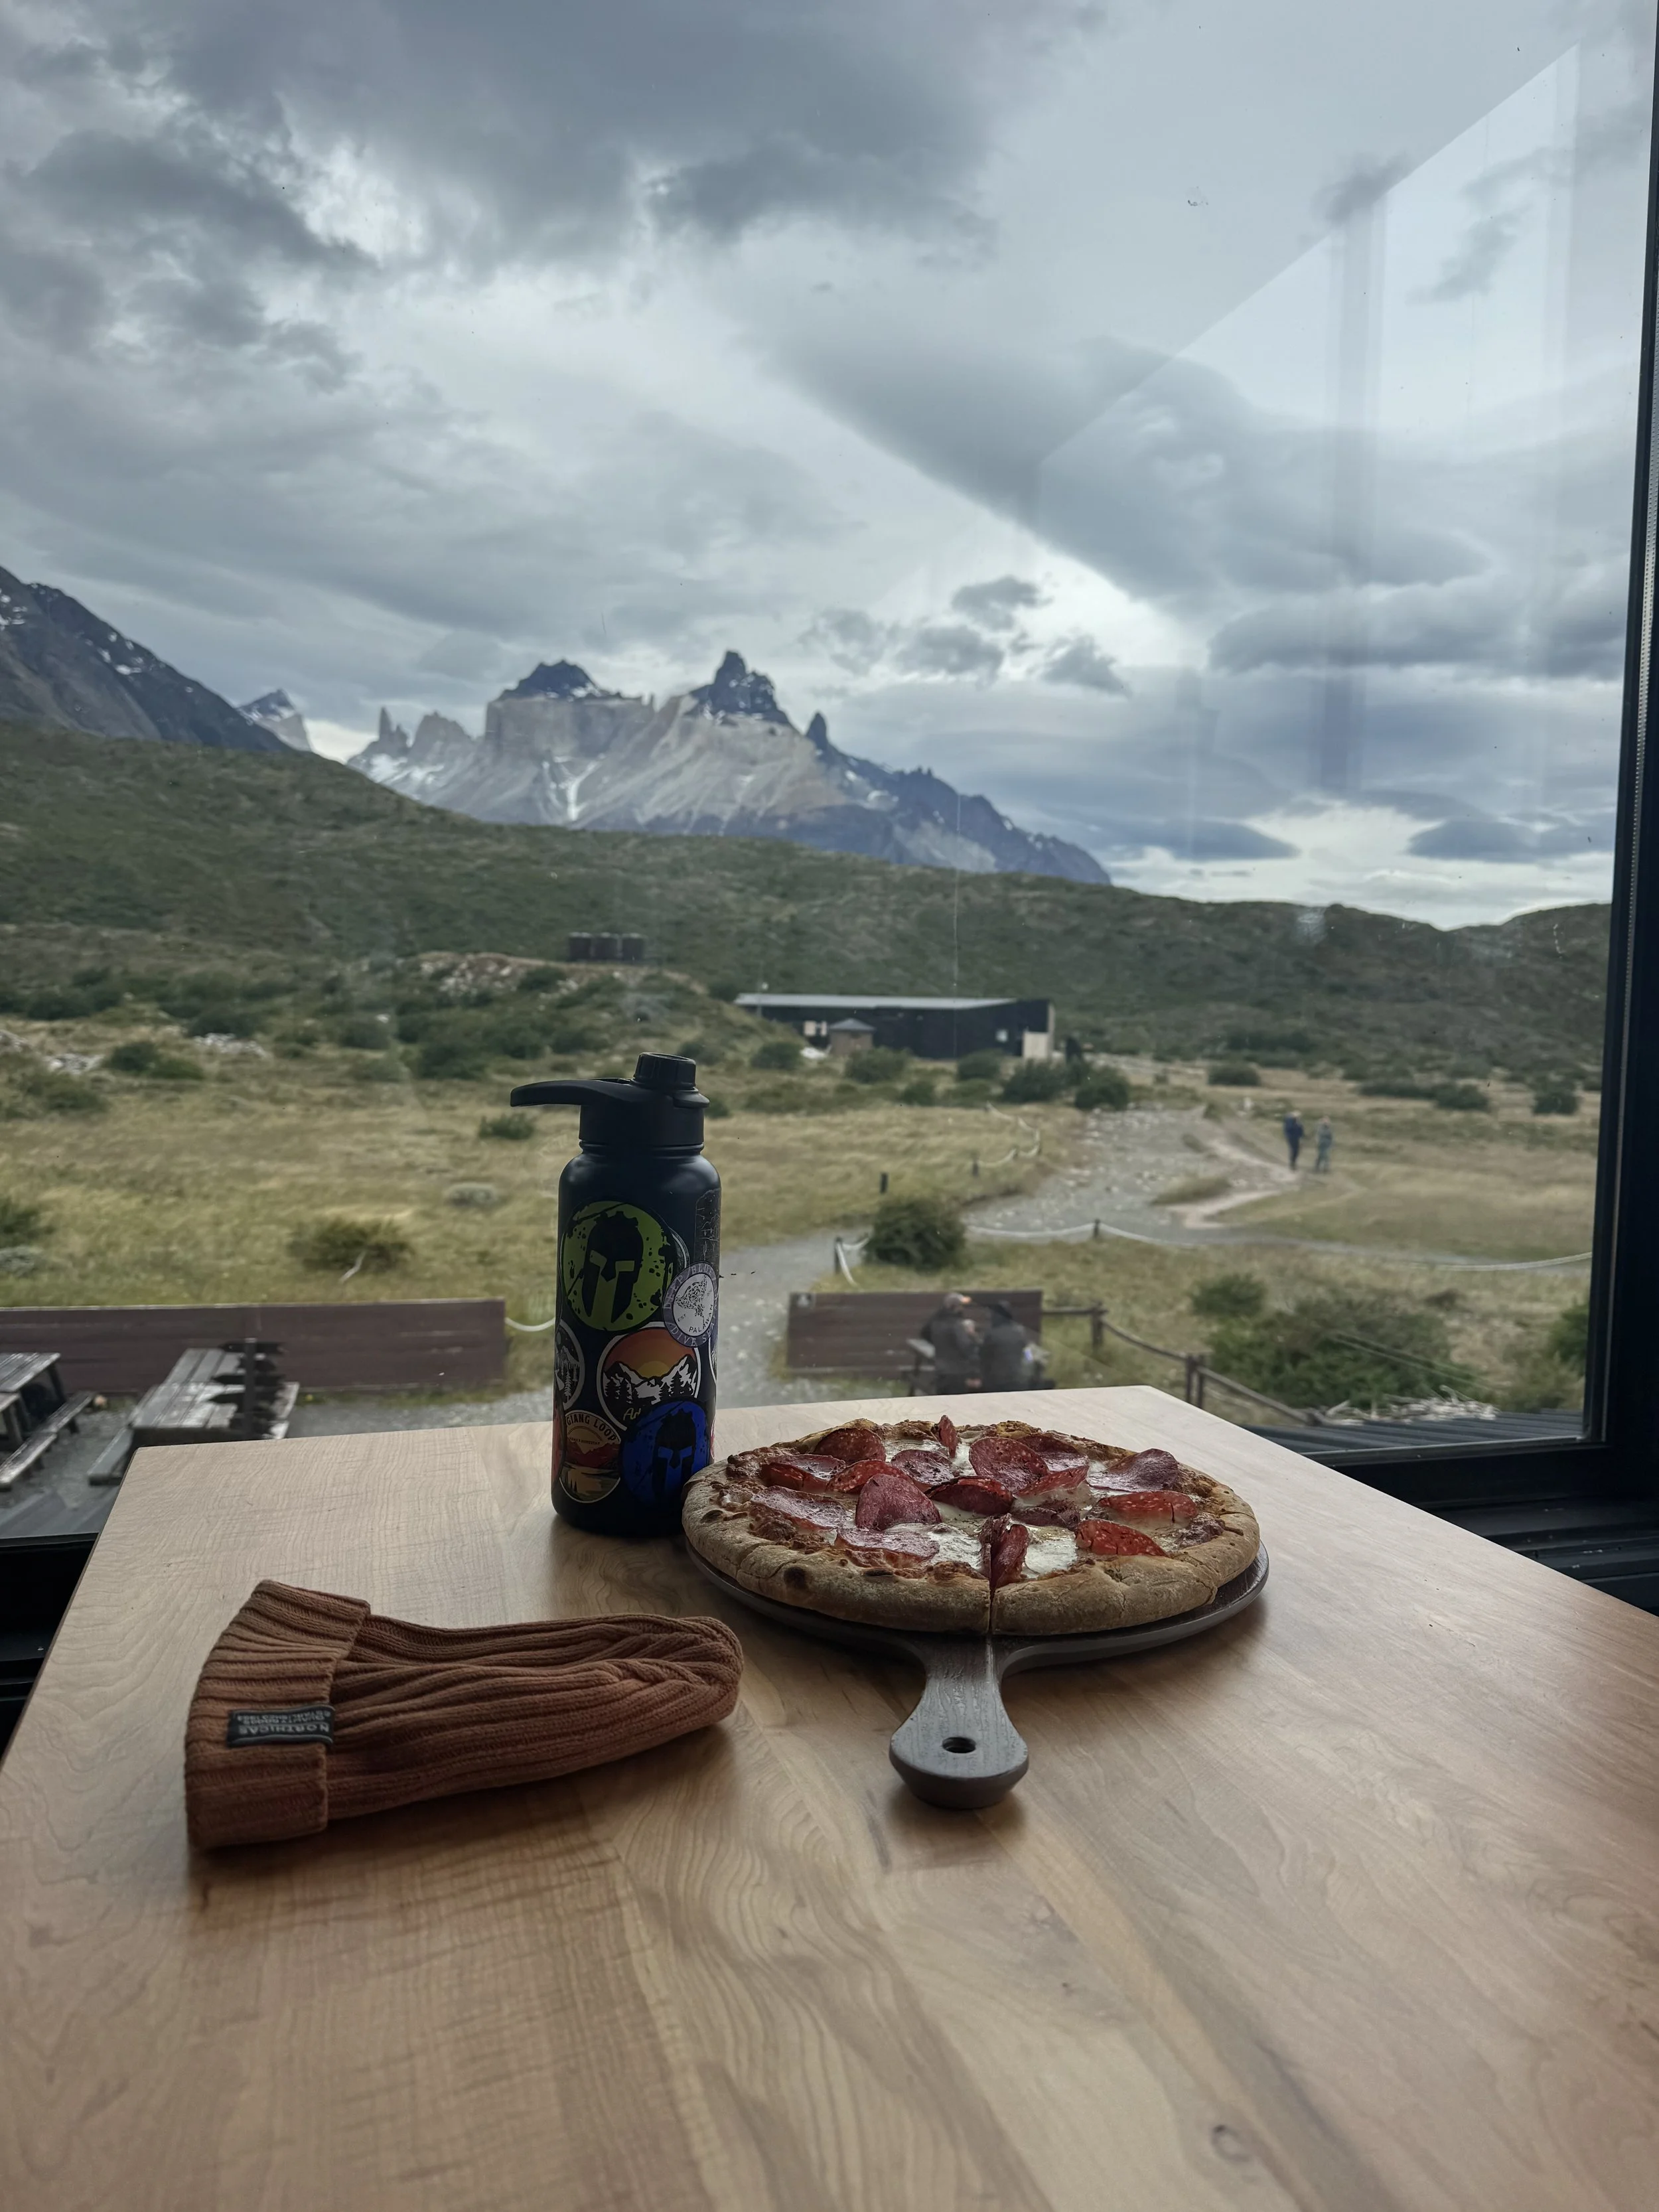
Though there are plenty of food options now on the trail. Even bars!
My East‑to‑West W‑Trek Itinerary
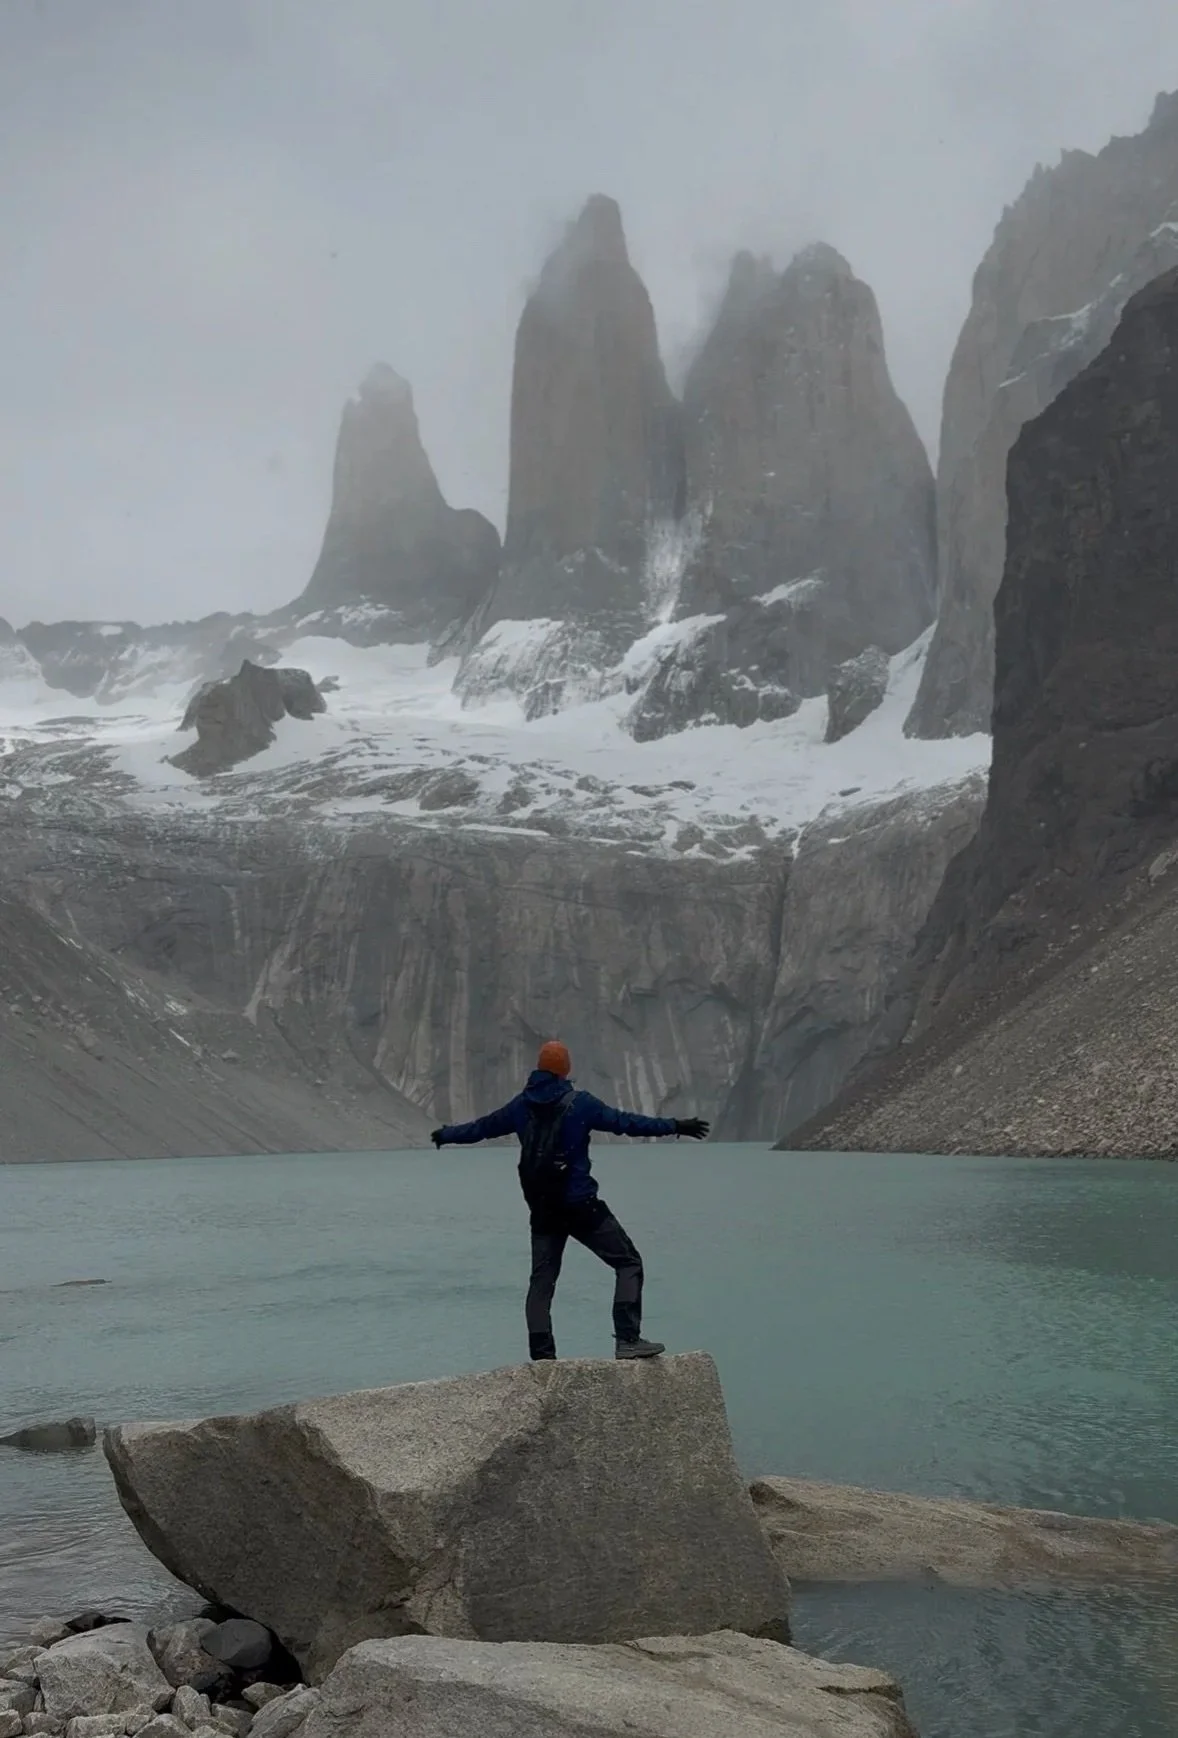
Day 1: Base Torres → Chileno / Central
Highlight: Sunrise or afternoon hike to the iconic towers
Enter park via Laguna Amarga
Shuttle to Welcome Center
Hike up to Base Torres
Steep, rocky final ascent
Standing at the base of the towers feels surreal — jagged granite piercing the sky. It’s the most photographed spot in the park for a reason.
Night: Chileno or Central campsite
Day 2: Chileno / Central → Los Cuernos
Terrain: Rolling hills, lakes, and dramatic cliffside trails
This is one of the most scenic hiking days:
Views of Lake Nordenskjöld
Wind‑exposed sections
Constant reminders of Patagonia’s scale
The Cuernos (the “horns”) dominate the skyline here — layered rock formations that feel otherworldly.
Night: Los Cuernos campsite
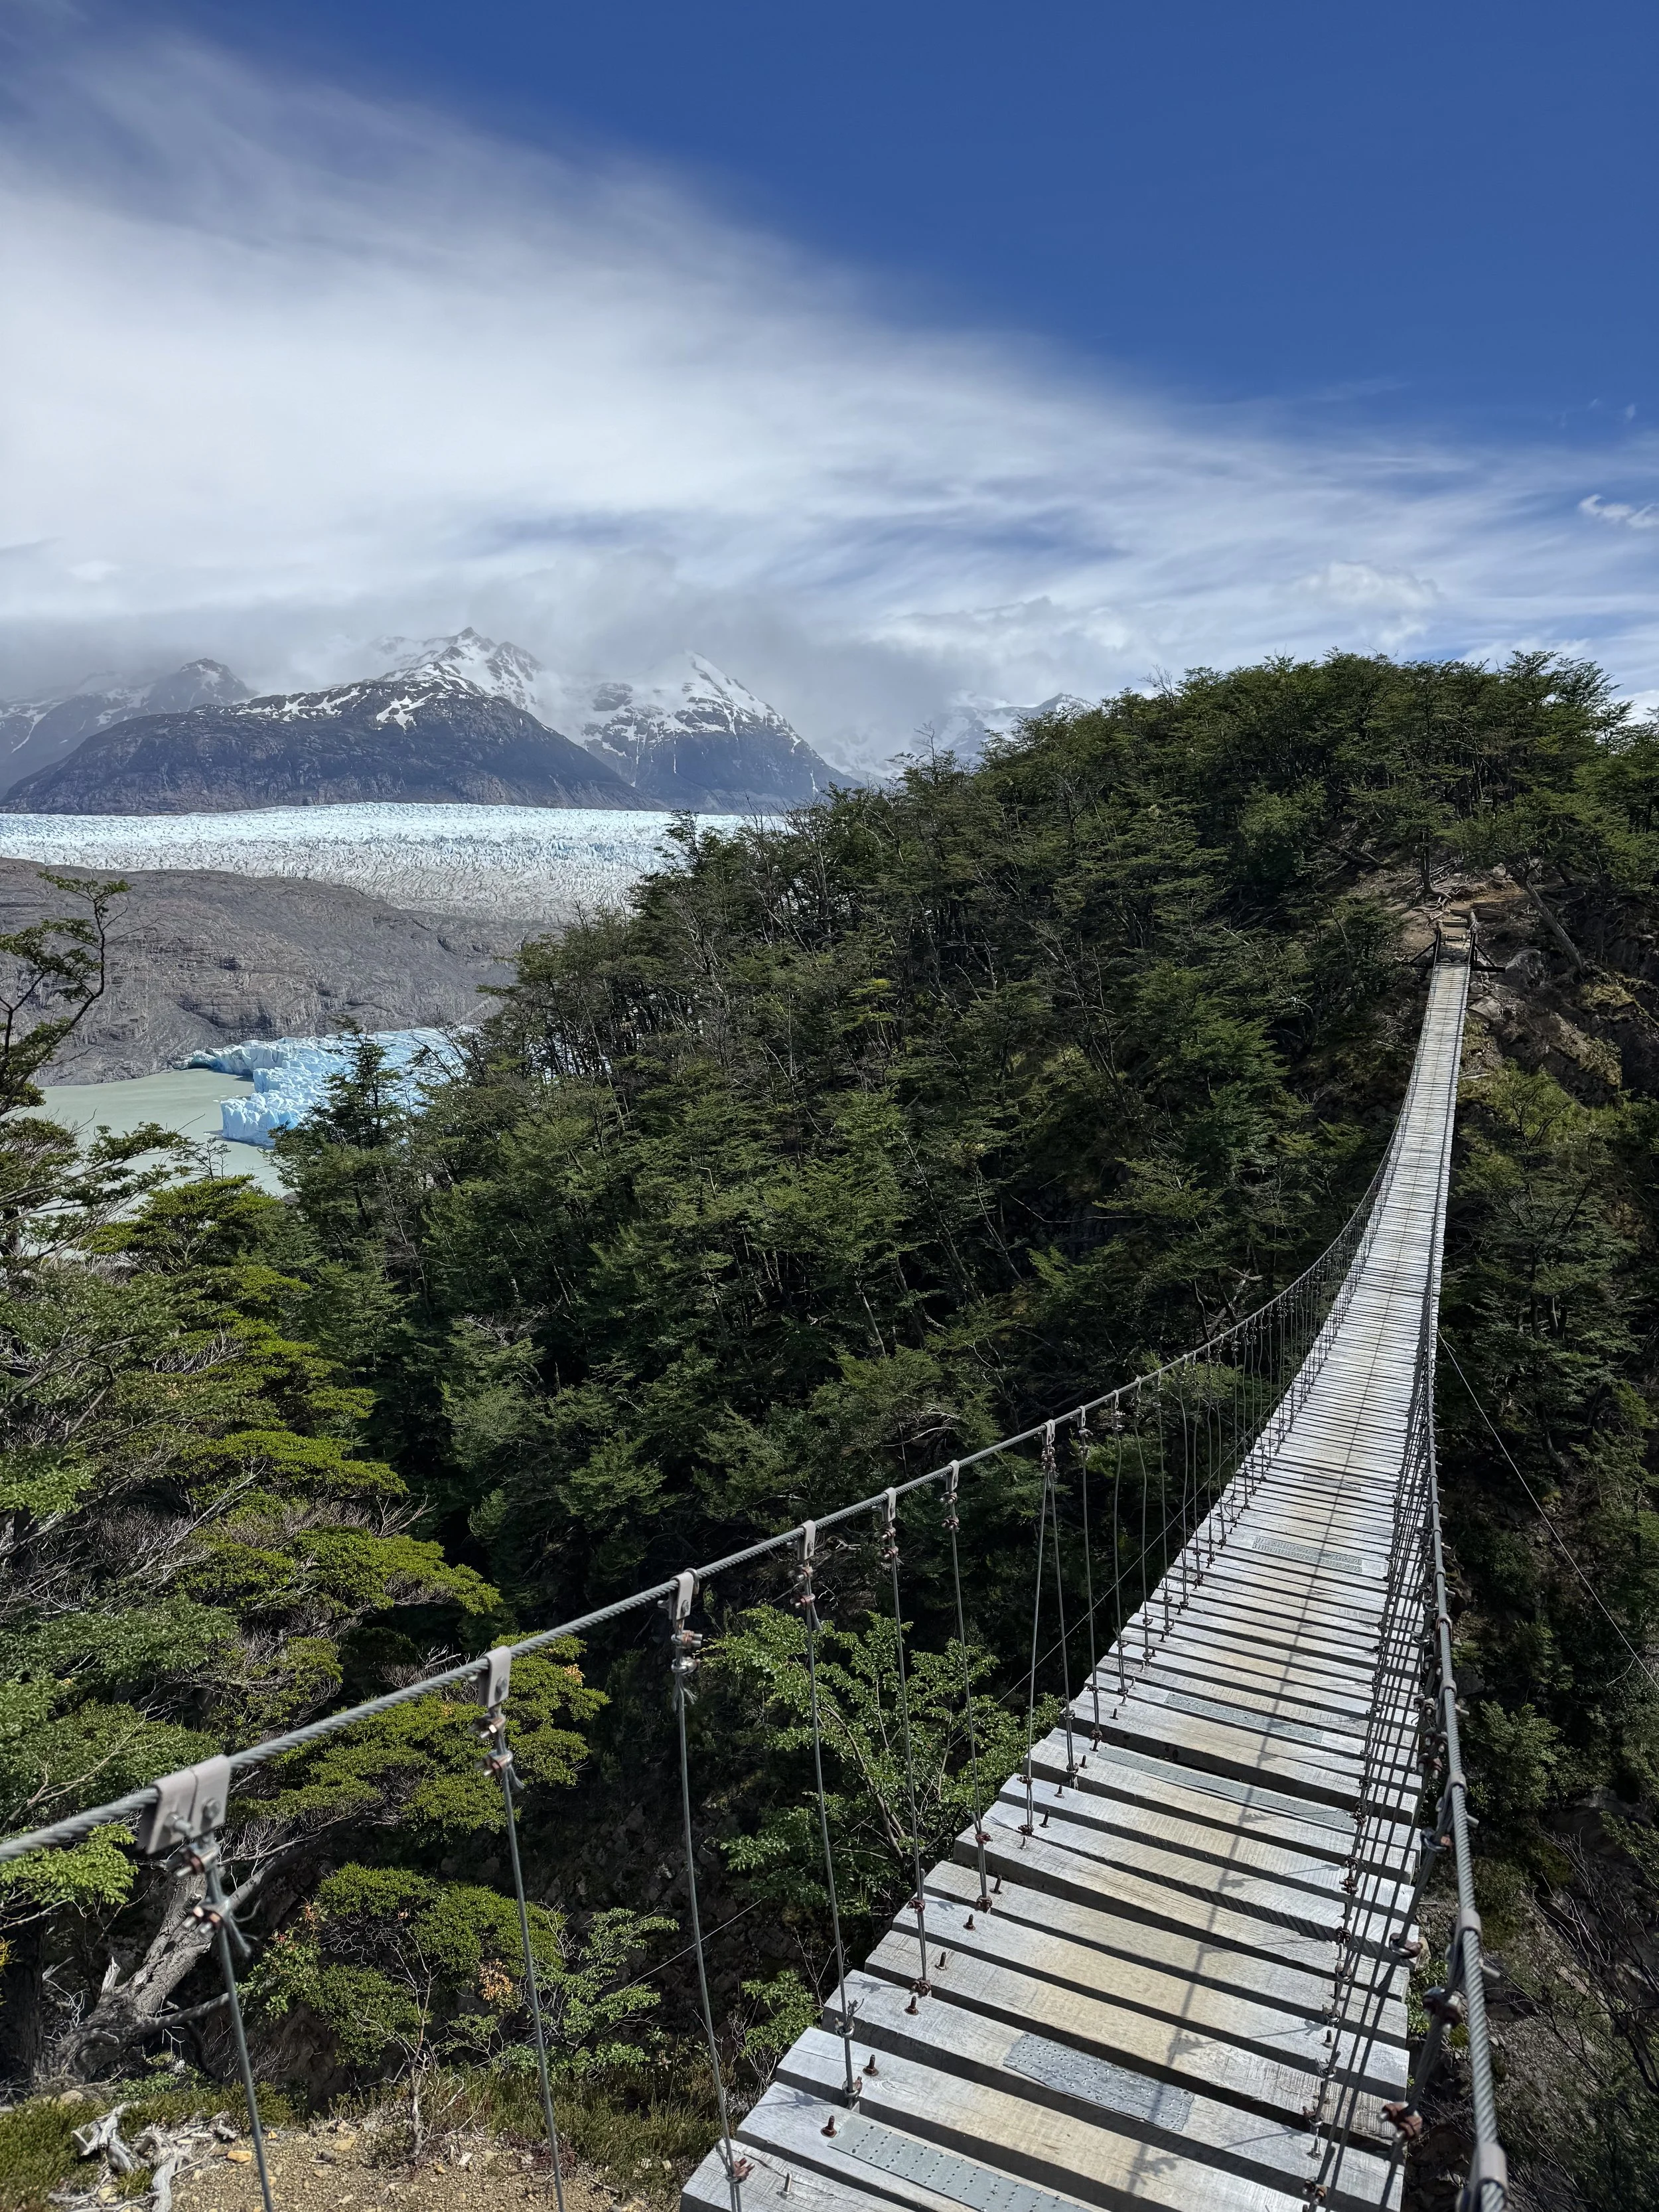
Day 3: Los Cuernos → Paine Grande (via French Valley)
Highlight: French Valley side hike
Drop pack at Italiano
Hike into French Valley to Mirador Británico
Glacier views, avalanches, hanging ice
This day is physically demanding but emotionally unforgettable. The sounds of ice cracking echo through the valley.
Night: Paine Grande
Day 4: Paine Grande → Grey Glacier
Terrain: Windswept ridges and glacier viewpoints
This section introduces relentless Patagonian wind but rewards you with:
Glacier Grey
Icebergs floating in milky blue water
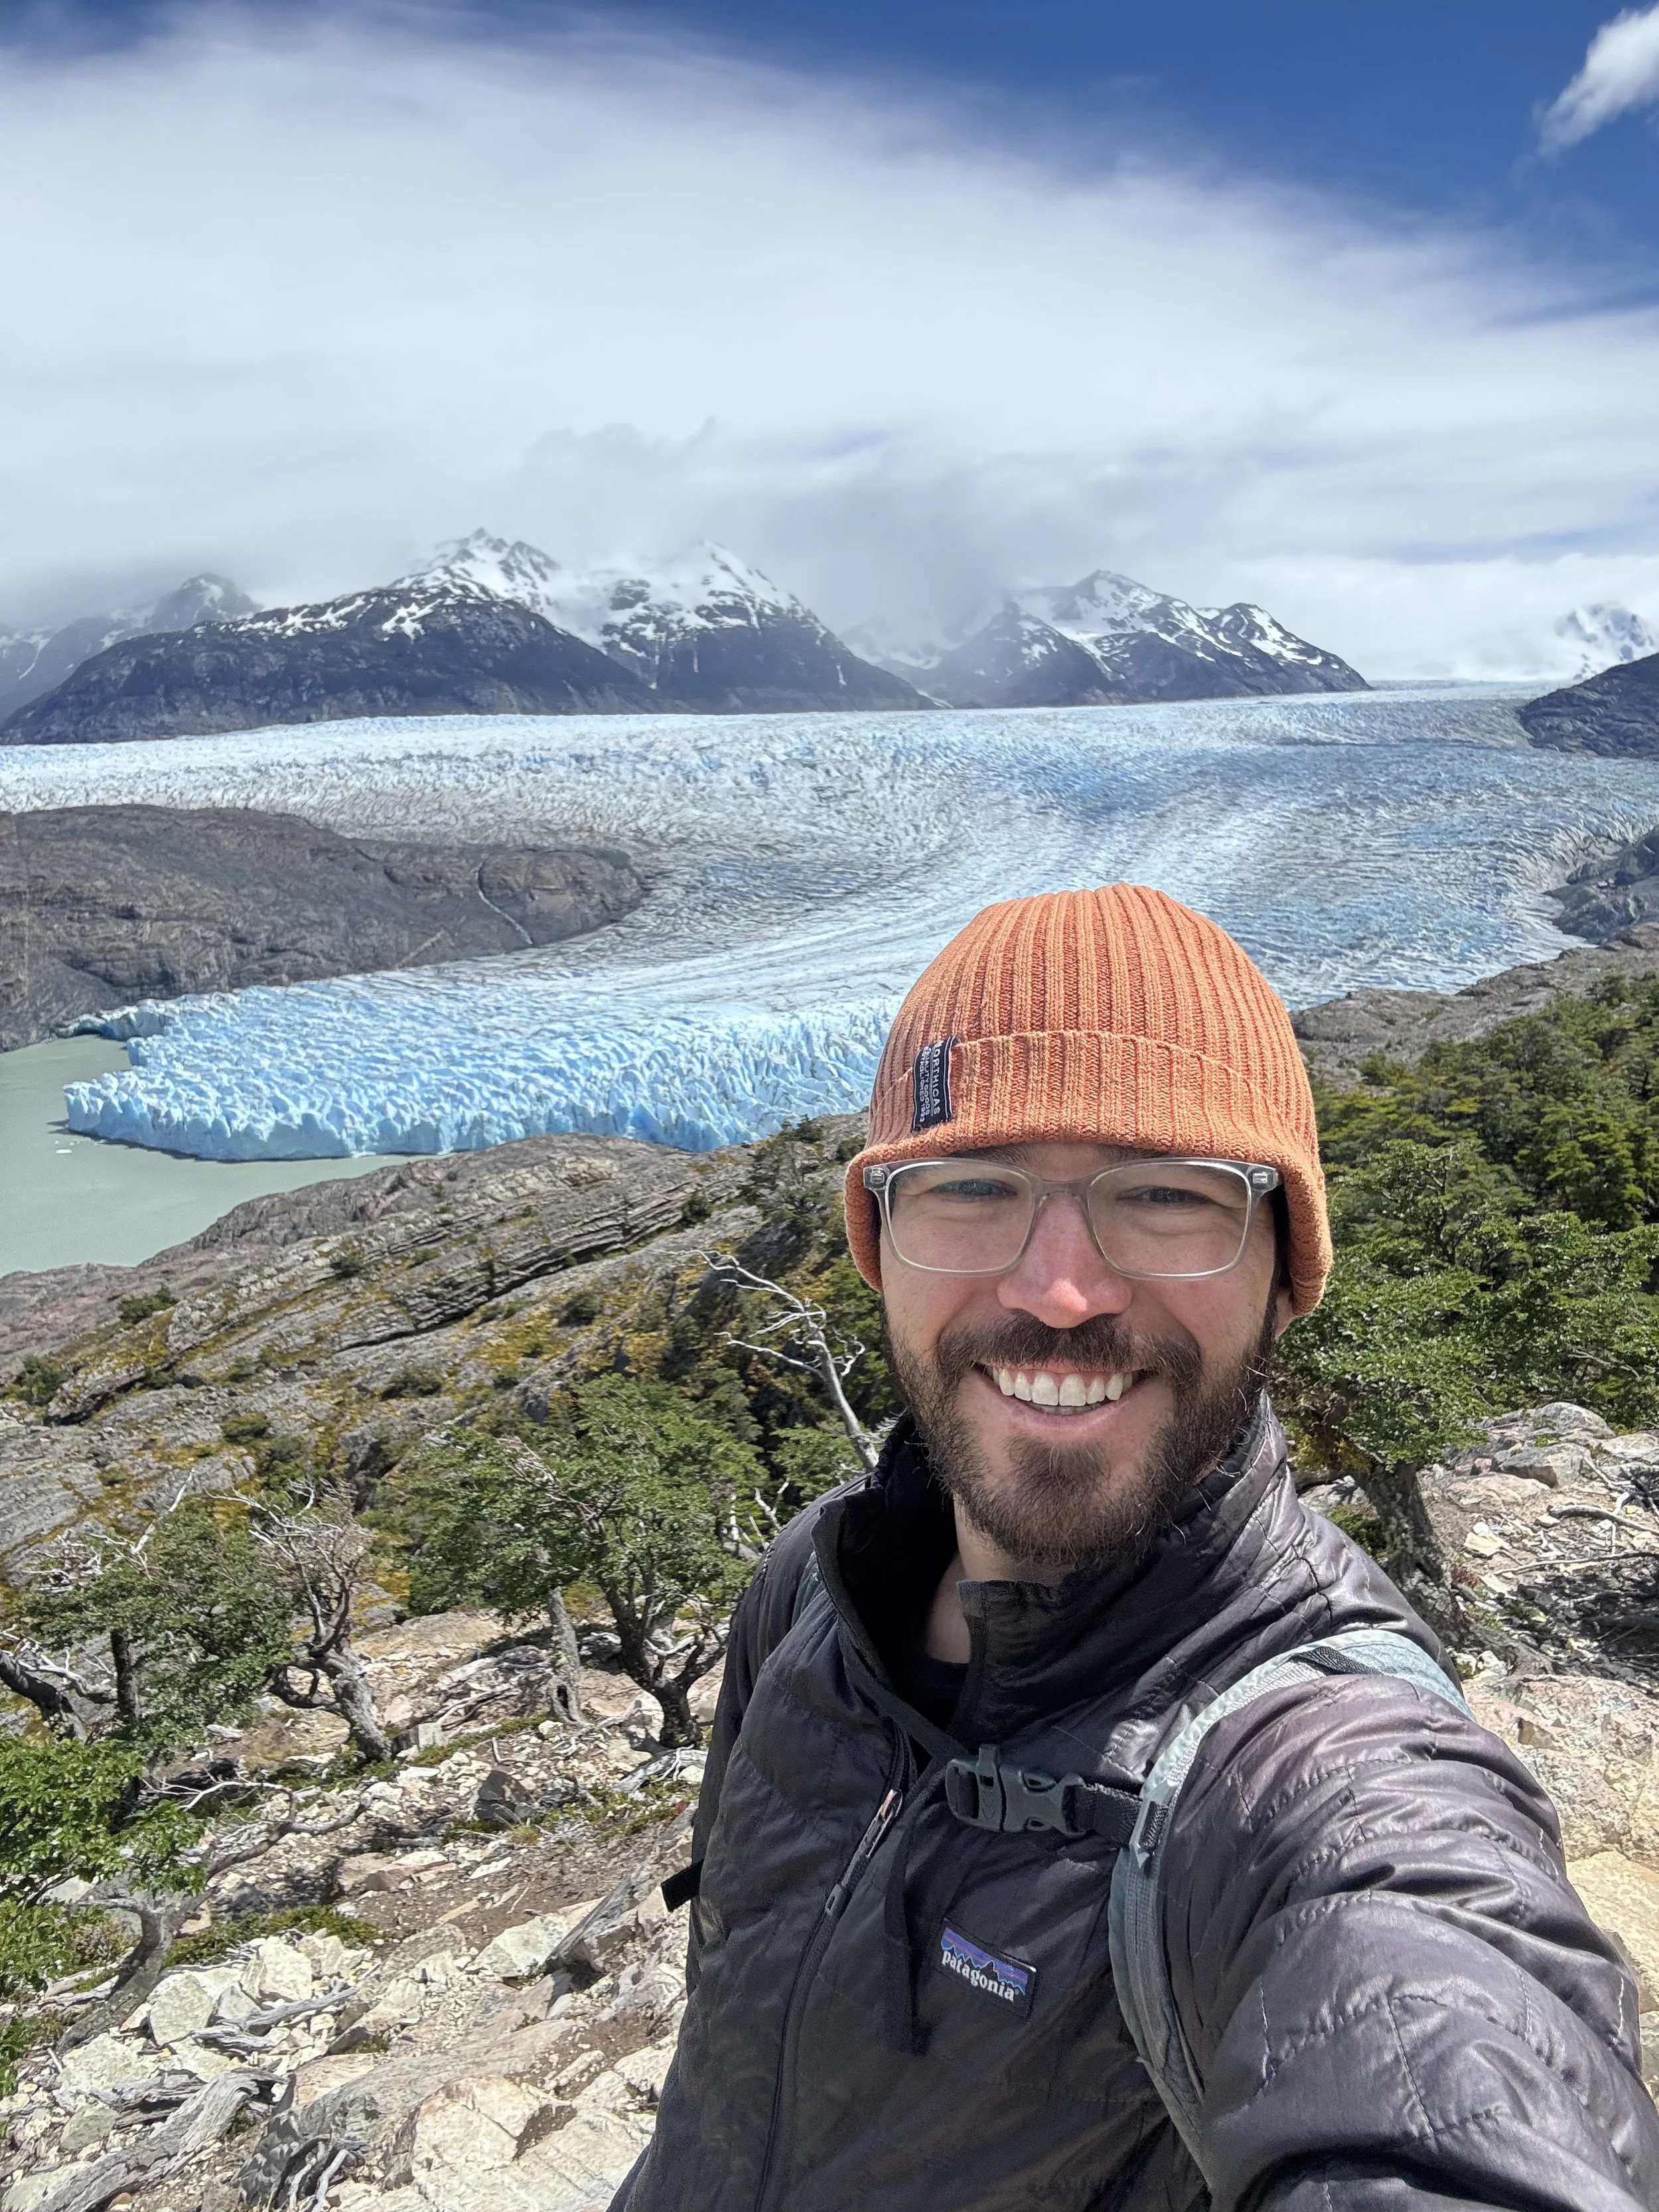
It feels raw, remote, and powerful.
Night: Grey campsite
Day 5: Grey → Paine Grande → Catamaran Exit
Hike back to Paine Grande
Board catamaran across Lake Pehoé
Bus back to Puerto Natales
The trail quiets here — a chance to reflect on what the last five days have stripped away and what you’re carrying forward.
What the W‑Trek Represents (For Me)
This hike isn’t about ticking a box. It’s about:
Choosing discomfort on purpose
Carrying only what matters
Trusting the process when the path isn’t clear
Sometimes the mountains call you because you need a new view.
And sometimes… because you need a new version of yourself.
Final Tips
Expect four seasons in one day
Wind can delay buses or catamarans
Always carry rain gear
Book early — seriously
If this guide helped you, save it, share it with someone planning Patagonia, and follow along as I take on this challenge.
And if you want to join future adventures around the world — you’re invited.
Coming Soon: Full city guides with detailed maps, top restaurants, hidden gems, and in-depth tips from our own experiences — stay tuned!
More Stories & Travel Tips Here
-
Some links in this blog are affiliate links — using them costs you nothing extra but helps support me in sharing more travel stories and tips. All ideas and experiences here are my own, and while I sometimes use an AI assistant to help with my writing process (editing spelling, grammar, and structure), the stories and perspective are 100% mine. I hope this inspires you to explore the world and share your own stories too!